13 June 2014

Tamiya 1/48 M26 'Pershing'


I started this model back in July 2011 at the annual IPMS Modellers Retreat, which at the time was held at the Heathcote Lodge in Heathcote. Although assembly of the model was largely completed at this time the model was shelved due to the need to finish off a number of commission builds, which I had in the works.

However, over the next few years I did manage to prime and paint the model and at the beginning of 2014 decided it was time to make a concerted effort to finish it off once and for all. 

I had intended to have it finished in time for the annual IPMS Wings & Tracks competition, held in April, but unfortunately missed this deadline. So with a renewed determination I decided to have it finished in time for the annual Australian Model Expo, which was held over the long-weekend in June (7-9 June). Fortunately for me I succeeded in making the deadline and the Pershing placed 2nd in the Military Vehicles & Equipment - Medium category.

The inspiration for my model was the image taken at left, which was at the Pusan Docks in Korea in 1950 and was the reason I chose to finish my Pershing as a 73rd Tank Battalion, Korean War example.

The model was enhanced with the addition of two Hauler etch sets (for the engine grills and exterior details), a Blackdog stowage set, JS Works ration boxes, Albion Alloys spring steel wire (for the aerials), adhesive aluminum tape (for the gun muzzle cover) and a pair of Squad 48 US tank crew figures. 

The model was painted with Gunze acrylics, weathered - using the Pat Johnston method - with a selection of AK Interactive oils, washes and pigments with the figures being painted entirely in Vallejo acrylics.

The model should never have taken this long to finish - I know- but I am more than happy with the outcome. So what's next then?? Maybe a Staghound or a GMC 6x6 truck......


16 March 2014

Centenary of Military Aviation

Australian Defence Force Image Library

Avro 643 Cadet
de Havilland DH 94 Moth Minor
de Havilland DH 82 Tiger Moth


NA T-6 Texan
CAC CA-12 Boomerang
CAC CA-12 Boomerang
CAC CA-12 Boomerang
Lockheed Hudson
Lockheed Hudson
Lockheed Hudson
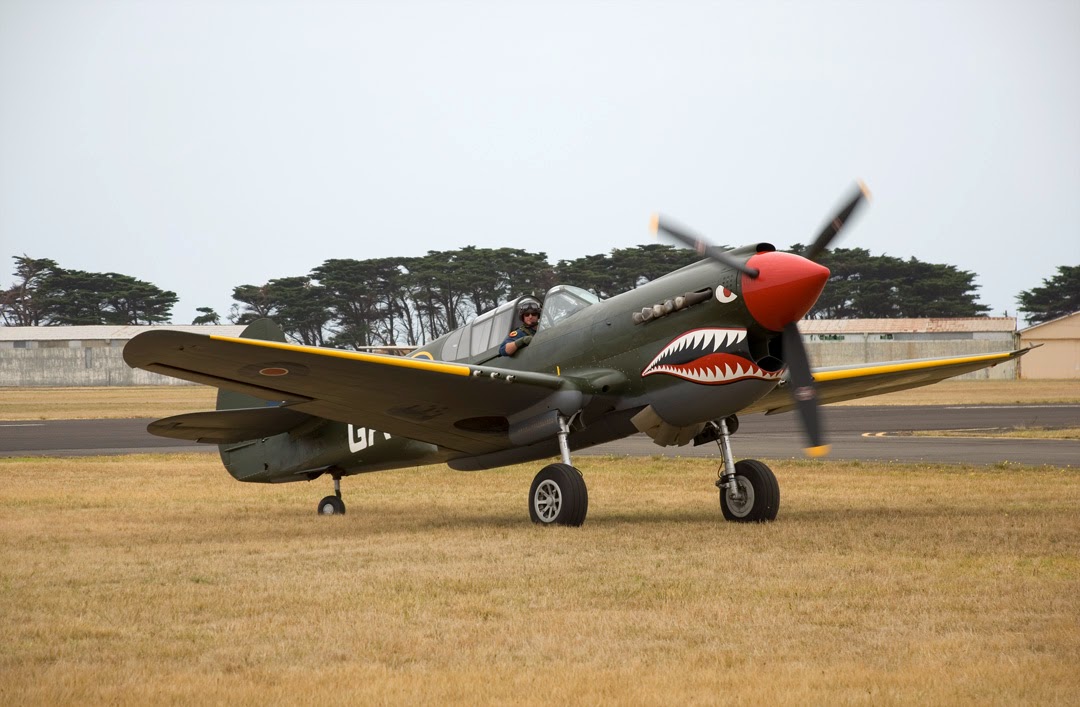
Curtiss P-40F Warhawk
Curtiss P-40N Kittyhawk
Consolidate PBY-6A Catalina
Supermarine Spitfire MKVIII
CAC CA-18 Mustang
Douglas C-47 Dakota
Gloster Meteor MK8
Gloster Meteor MK8
Gloster Meteor MK8
Gloster Meteor MK8

CAC CA-25 Winjeel
de Havilland DH 100 Vampire
Cessna C180
Cessna C180
DHC-4 Caribou

27 February 2014

Hobby Boss 1/72 Sikorsky UH-34D 'Choctaw'


I started this kit back in July 2013 whilst attending the IPMS model camp, with the sole purpose of building it as an out-of-box model and just for a bit of FUN. Although I managed to get most of the parts cleaned up and the majority of the model assembled, it was eventually shelved due to an overseas holiday, followed by the need to finish off an F-15E Strike Eagle for a customer.

With the latter project completed I then wanted something easy to do, which wasn't going to be to taxing and the Choctaw fitted the bill perfectly. However, during the time the model had been laid up I'd managed to collect and study a lot of photos on the subject and realised that the kit had quite a few short comings. 

Therefore, in an endeavor to make the model at least look like a Choctaw, and avoid the onset of AMS, I decided to add the mesh covers, grab handles, tie-down points, steps, seat-belts and instrument panel from an Eduard etch set. The cockpit glare shield, underside armor plate and aft rotating beacon from plastic card, and brake-lines, hydraulic lines, fuselage vent pipes and whip aerial from fuse wire. This being pretty much all I wanted to do.

I was also fortunate enough to be able to score a decal sheet and upper rear louvered fuselage panel from an Italeri kit, thanks to a friend who'd built his kit as a Wessex and had these left over items to spare. The Italeri part is far more accurate than the Hobby Boss offering and the decals are much more interesting in their choice of subject, hence why I choose the early Vietnam, Marine scheme.

I painted the model entirely in Vallejo Air colors and masked off several panels, which were then sprayed with a 50:50 mix of Field Green and Radome Tan, to give a little more variation. I then sprayed the centers and edges of selected panels with the same mix, although a little more lightly, to represent fading. The model was then gloss coated - with Future - the decals applied and the panel lines and mesh accentuated with several coats of Vallejo's Light Grey wash. I really love their range of washes as they are easy to apply with a fine brush, are fast drying and can be built-up gradually with several applications.

The model was then over-sprayed with a very dilute mix of the base colour (Field Green), which helped to tie everything together, and was then sprayed with Vallejo's Satin Varnish. The the cabin door, tail and main rotors were then fitted, masking removed and the model was finally finished.

So did the model achieve my initial purpose? Most certainly, as it was a FUN and enjoyable build of a subject that I really liked and one which I'm very happy with, although technically it is no longer an out-of-box model, but who really cares about that?