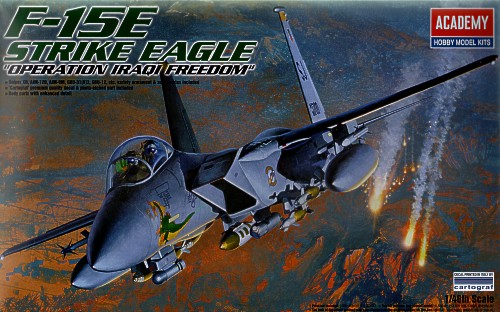
When asked to build three models for a customer - which he supplied - I decided to tackle what I thought would be the easiest one first. Why? Because being a jet and in my preferred scale I thought it would easy. Unfortunately, as the build progressed it would become evident that this was not the case.
I have to admit that jets are definitely NOT my preferred subject matter when it comes to modelling aircraft and neither are Academy kits, as to date I've not had a good experience with building any of their products. As a consequence I found this kit to be one of the most challenging and frustrating builds I've done in a while, as it has a number of fit issues and inaccuracies and the placement instructions for the 'Common Data' decals were completely wrong. But thanks to a friend of mine who builds modern jets, I had access to a shed load of reference material which helped me immensely.
So the things I had to deal with during the build were as follows:
- After attaching the cockpit tub to the nose wheel bay - as per the instructions - the top of the front instrument panel sat about 3-4mm below the front coaming, leaving a noticeable gap between both it and the cockpit sidewalls. As a result I had to remove the cockpit tub from the nose wheel bay, add some Evergreen angle-iron strip to raise it about 5-6mm, which then allowed the cockpit tub to sit in the correct position within the fuselage, with no more gaps. However, the downside to this was that the canopy frame cross brace now fouled the rear cockpit coaming and meant that the canopy could only be fitted in the open position.
- The kit ejection seats are fairly basic and poorly detailed, so for the sum of just $8.00 I replaced them with a set of resin Aces II seats (for F-15's) from Legend Productions.
- The instruction sheet shows the forward nose landing gear door being attached to the forward right-hand side of the nose wheel bay and in the open position, which is incorrect. Photos clearly show that this door is closed, regardless of whether the landing gear is up or down. However, the door is far too long to be fitted in the closed position and needs to be shortened by about 7-8mm, so it fits flush and in the closed position.
- Fitment of the forward nose section to the main fuselage is totally reliant on a very narrow butt join, with no tabs to assist in location or alignment. Therefore tabs were made from Evergreen styrene sheet and attached to the main fuselage, which helped with alignment and provided a much stronger join.
- Each intake is made up of 3 pieces making their assembly and fitment somewhat fiddly. They also require filling and sanding to eliminate the joins as well as a number of ejector pin holes.
- Whilst sanding and test fitting the conformal fuel tanks - to ensure a good fit - I discovered that the location marks for the 6 small bomb-racks was incorrect and that they needed to be positioned much lower and further aft as clearly shown in photographs.
- The location holes for the main undercarriage legs are somewhat over-sized - not well engineered like Tamiya kits - and to ensure a strong bond and help to fill the void, they required a liberal application of super glue. I just hope that they hold up.
- There are some exhaust outlets on the top aft section of the fuselage, some of which shouldn't be there and others that are of the incorrect shape. These were all filled and new ones drilled out in the right locations.
- When the horizontal stabilizers were fitted to the fuselage there was a significant gap both fore and aft whereas they should fit flush. The fuselage areas were built-up using Evergreen card and filler and filed and sanded to shape.
- The panel lines over the entire model were either shallow or non-existent and therefore the model was completely re-scribed.
The model was then sprayed with a coat of Future and I then had to deal with the following decal issues:
- The placement instruction for the 'Common Data' decals are completely wrong - they appear to be a generic sheet for early F-15's - so I referred to photos on both the MJ Aviation and Jetscape Photography websites, to work out which ones to use and where to place them.
- Although the Cartograf decals supplied with the kit are superb and performed flawlessly, some of the unit badges are inaccurate and additional markings - like the Wright Flyer emblem on the inside of the fins - are not included. These were replaced by items from the Cutting Edge sheet, 4th But First #1, which was sourced online.


